- an overview of serverless application development
- the goal of this tutorial
- the plan we intend to follow
- what are the prerequisites that need to be fulfilled in order to follow this tutorial
In order to follow this tutorial, you must use Webiny version 5.18.0 or greater.
The complete code for the application we’ll be building in this tutorial can also be found in our GitHub examples repository  .
.
Overview
Except being the first serverless CMS out there, Webiny is also categorized as a serverless application framework . In other words, it is a framework that enables developers to architect, build, and deploy solutions on top of the serverless cloud infrastructure, like AWS Lambda , Amazon DynamoDB , Amazon S3 , and others.
Some examples of what you can build with Webiny today are:
- full-stack applications
- websites
- REST and GraphQL APIs
- microservices
- and more
No matter what you end up building, it’s worth pointing out that all of these different types of applications consist of two fundamental pieces: application and cloud infrastructure code.
Application code is your frontend and backend code. For example, a React application with all of its components, hooks, providers, and so on, is code that falls into this category. On the backend side, we also have GraphQL API schema definition, resolver functions, and basically any type of business, authentication, and authorization logic that might be required.
Cloud infrastructure code defines the necessary cloud infrastructure resources that need to be deployed in order for the application to work and to be accessible by your users. It may include definitions of multiple different types of resources, like functions, databases, file storage, CDNs, and more.
We’ll see both application code and cloud infrastructure code in action in the following sections of this tutorial.
To deploy necessary cloud infrastructure, by default, Webiny relies on Pulumi, a modern infrastructure as code framework. Find out more in the following IaC with Pulumi key topic.
How do you handle these two together as a single unit? Well, that’s where Webiny serverless application framework comes in. By providing the proper tools, methodology and best practices, Webiny enables seamless integration between the two, and ultimately, enables developers to build powerful applications that sit on top of the serverless cloud infrastructure.
And that’s what we’ll be exploring in this tutorial, by building a completely custom application, from scratch. Let’s see what we’ll be building.
The Goal
The goal of this tutorial is to learn how we can create a full stack application, using Webiny serverless application framework. More specifically, we’ll be building a browser application that is essentially a clone of Pinterest , a popular website for finding ideas like recipes, home and style inspiration, and more.
Of course, we’ll be building a much simpler version of it. The application will allow users to:
- sign up and sign in into the application
- create new pins which will consist of three pieces of information: title, description, and a cover image
- list and view pins created by themselves and other users
This is the end result we’re aiming to achieve:

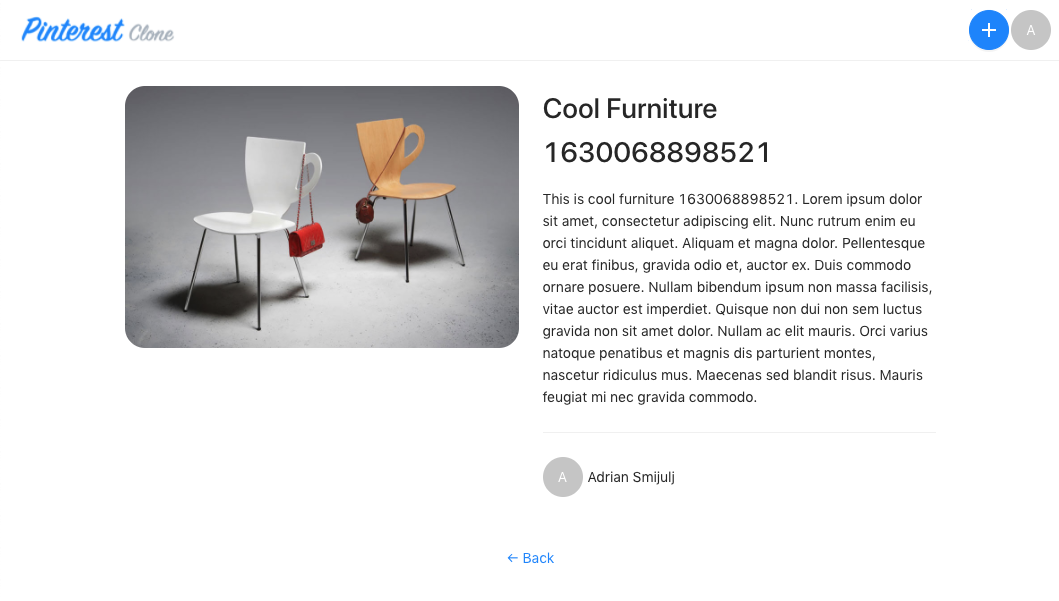
For now, we won’t go into the specifics of which tools and libraries we will use, but we will mention the application will be completely serverless.
The Plan
Before we start doing any coding, let’s quickly outline the plan we intend to follow over the next couple of sections of this tutorial.
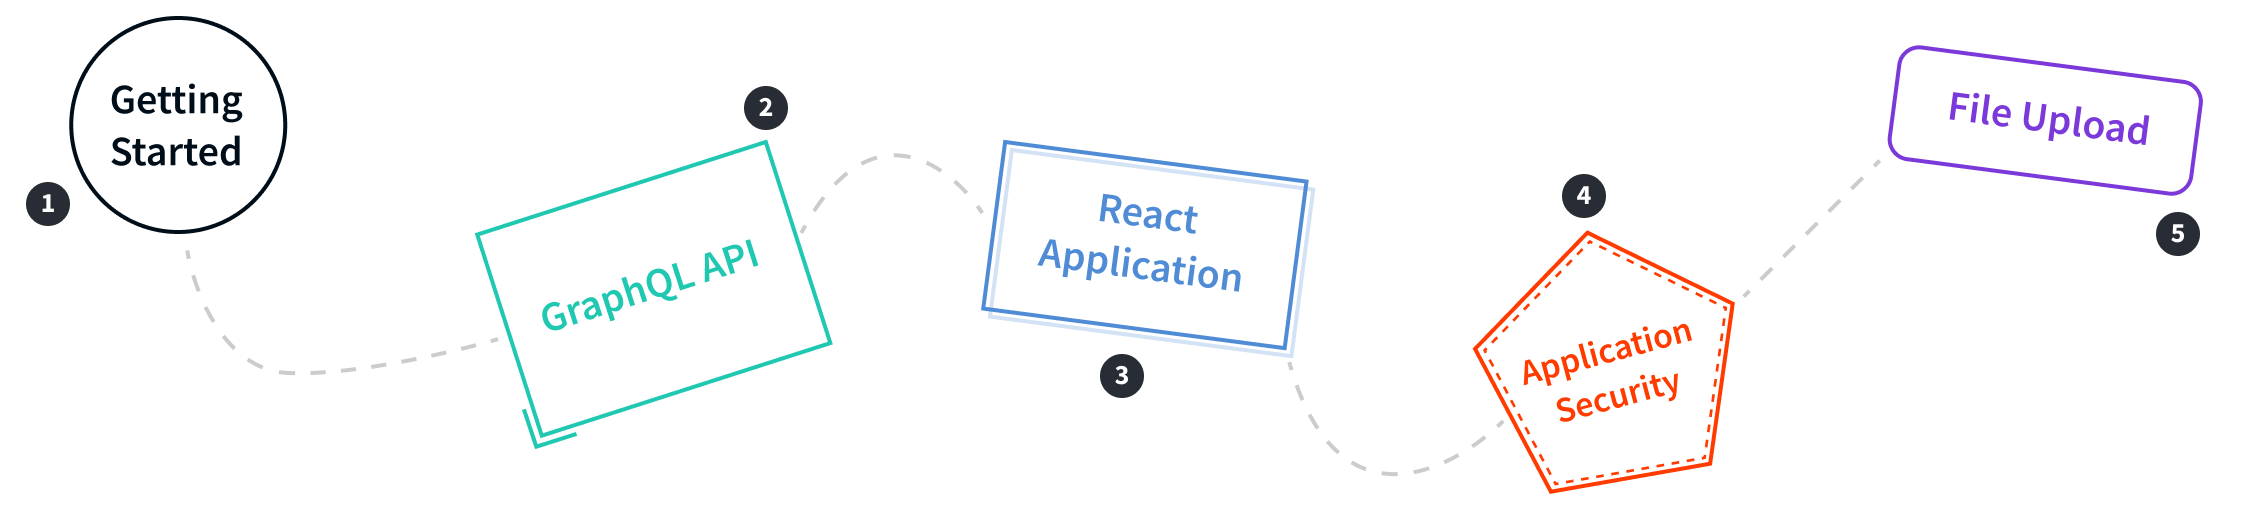
Getting Started
We start our journey by introducing the Full Stack Application scaffold, which will create the two fundamental pieces of our application: the GraphQL API and the React application that’s interacting with it.
We’ll also dedicate a couple of sections on how to approach development using the webiny watch command, just so where all on the same page here.
GraphQL API
In this section, we start working on our GraphQL API, by extending it with the new Pin types and a basic set of related GraphQL query and mutation operations.
React Application
Once our GraphQL API is in place, we’re ready to start working on our frontend React application. The section itself is also organized into five sections, ensuring we don’t rush with any of the steps we need to cover.
Security
In this section, we show how we can secure our application by integrating Amazon Cognito .
Apart from providing a way for users to sign up and sign in to the application, we also gain the ability to tie every created pin to a user, which we’ll display in the application. Last but certainly not the least, we also get to implement necessary security (authorization) checks on the GraphQL API.
File Upload (coming soon)
In today’s world, no application is complete without a file upload feature, so that’s what we’ll cover in this final section of this tutorial. By enabling users to attach an image to their pins, the whole website will become more lively and more pleasant to use.
Prerequisites
In order to follow this tutorial, you should have a solid understanding of JavaScript , Node.js , GraphQL , and React .
On the frontend side, for anything styling-related, we’ll use Sass , which is already included in every Webiny project. We’ll also include the Ant Design React library to create the majority of the user interface. For both of these, a basic understanding will suffice.
Furthermore, we’ll deploy our application to Amazon Web Services (AWS), where we’ll rely on a couple of common and popular services like AWS Lambda , Amazon DynamoDB , Amazon S3 , and more. In-depth knowledge of these service is not needed, but it is recommended to have at least a basic understanding of what they are used for.
Finally, note that you should have a new Webiny project set up on your machine, version 5.18.0 or greater.
Didn’t had the chance to set up Webiny yet? Check out the Install Webiny tutorial.